|
Website:
http://www.truevalue.com
Level of difficulty: Beginner

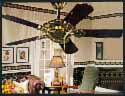
Thanks to today's electronic controls you can use your existing
switch wiring to power and fully control a ceiling fan/light. This
type of control, consisting of a receiver installed in the fan
and a transmitter installed in the wall switch, allows on/off and
dimming for the light, and on/off and speed control for the fan.
In the past, you had to make do with unsightly and inconvenient
pull-chains to turn the light on and off (no dimming) and to set
the fan speed, or rely on expensive professional installation.
Now, though, whether you have an existing fan that is controlled
with a simple on/off switch or you are installing a new fan, here's
an easy way to wire it for optimal control.
 Tip:
Tip:
If your wall switch is not in a convenient location, there's even
a battery-operated, hand-held, remote-control version of the wall-mounted
control described here.
 Caution:
Although you may be able to use existing ceiling outlet wiring
for a new ceiling fan, you cannot mount a ceiling fan to the existing
ceiling light outlet box. The special mounting box and hardware
required for fan installation are available at True Value stores. |
Tools & Materials
- Two-wire fan/light control
- Lineman's or long-nose pliers
- Rocker-style switch cover plate
- Neon electrical circuit tester
- Stepladder
- Standard screwdriver
|
1. Preset Fan and Light
While the power is still on, turn the fan/light wall switch to
the on position and use the pull-chains to turn the light on and
the fan on high speed. |
2. Shut off Power
At the main circuit panel, locate the circuit for your fan/light
and either remove the fuse or switch the circuit breaker to the
off position. |
Tip:
Although the fan/light will be off if you have correctly disconnected
the power, switch and ceiling outlet boxes may contain wiring for
more than one circuit. Always double-check that power is off to
all wires in these outlets. Use a simple neon tester to verify
that hot wires (black or red) are dead by touching one probe to
the hot wire and the other probe to the white (neutral) wire(s). |
3. Disconnect Existing Fan Wiring
If you are installing a new fan, complete the installation up to
the point when you are to wire the fan and switch. If you are modifying
an already wired fan/light, reverse the installation as needed
to remove the fan canopy and disconnect the wiring. Remove the
switch cover plate and disconnect the existing single-pole switch. |
Tip:
If wires are plugged into holes in the back of the switch instead
of being wrapped under terminal screws, press a very small screwdriver
or similar pointed tool into the small slot adjacent to each hole
to release the clamping pressure that holds the wire in place. |
 4. Install the Receiver
The receiver, which receives the signals from the transmitter to
control the fan/light operations, is installed in the fan canopy.
Using twist-on wire connectors supplied with the controls, follow
the manufacturer's simple wiring diagram to wire the unit. Connect
one pair of receiver wires (one black and one white) to the two
wires coming from the switch, and connect the other three receiver
wires (red, black, and white) to three corresponding wires coming
from the fan/light. Complete canopy and fan installation. |
5. Install the Transmitter/Switch
Again following the simple wiring instructions included with the
control, connect the two wires that you removed from the old switch
to the new transmitter/control. Mount the control to the outlet
box and install a rocker-style cover plate. Restore power. |
Tip:
As you will no longer need the fan's pull-chains and, in fact,
using them may damage the new controls, cut off the chains with
lineman's pliers so only about an inch remains outside the canopy. |
Note: This article was submitted by a second party and the contents are subject to
our disclaimer.
|