|
Website: http://www.truevalue.com
Level of difficulty: Advanced

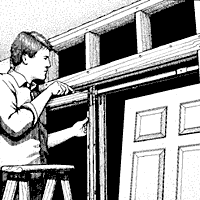
If you want to add a door to add privacy to an area, a traditional swinging door may not do the trick if the space is tight. Instead, consider a sliding
pocket door, which offers the benefits of a door without crowding or interfering with furniture placement. When opened, it is completely hidden within the
wall cavity. It's a particularly good choice to occasionally divide a dining room and a kitchen or a study and the master suite. Here are the basics for
installing a pocket door.
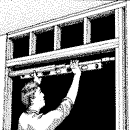 1. Install Track in Framed Opening
Frame (or reframe) the rough opening according to pocket door maker's specifications. Be sure the rough stud at the door opening is plumb. Then cut the
pocket door header-and-track assembly to length with a hacksaw; and install it (left) at the specified height using the fasteners and brackets supplied
with the door. The assembly must be level.
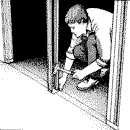 2. Frame Pocket
Attach a pair of jamb stiffeners (thin, metal-reinforced supports for the wall material) to the floor brackets. Attach them as directed to the header.
Then plumb them with a level and nail the brackets to the floor. Repeat for the second pair of stiffeners installing them in the middle of the pocket.
Install the door bumper in the face of the stud at the back of the pocket. |
 Tip:
Tip:
Paint or finish the door before you install it. Be sure to paint all edges to prevent excessive moisture vapor from entering the door and causing
it to warp. |
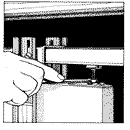 3. Install Hardware and Hang Door
Secure the door plates to the top of the door; put the two 4-wheel hangers in the track. Then hang the door on the two hangers and use the adjusting
nuts (left) to adjust the door for height and plumb. You can also install the door handle/latch at this point. |
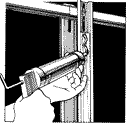 4. Finish Wall
Install drywall over the door pocket using construction adhesive and 1-in. nails or screws. Spackle over the fasteners and tape the joints. |
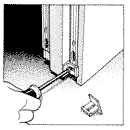 5. Install Door Guides
Install door guides on the inside and outside of the door at the mouth of the pocket. The guides, which are adjustable, should center the door in
the opening and allow just enough clearance for the door to slide smoothly. |
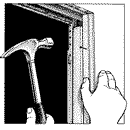 6. Install Jambs
Nail the two-piece strike and head jambs on either side of the door so it is flush or just proud of (slightly extends from) the finished wall surface.
Use screws to install one side of the head jamb so you can remove the door in the event of a problem. Install a full-width jamb on opposite side
jamb (called the strike jamb). Drill a hole and chisel a shallow mortise in that jamb for the strike plate. |
 Tip:
Tip:
To make the head-jamb screws less noticeable, use trim screws, which have heads about the same size as the head of a casing nail. You can even countersink
and cover the screws with a dab of caulk. Just don't do such a good job that you won't be able to find them if you need to remove them! |
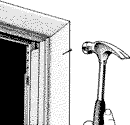 7. Trim out Door
Install door casing, nailing it to jamb and to pocket door stud with finishing nails no longer than the thickness of the casing plus the drywall
plus the 3/4-in. stud thickness. Add wood glue to the miters and a bead of construction adhesive to the backside to compensate for the light nailing.
|
Materials List
- Pocket door
- Tape measure
- Hammer
- Spirit level
- Framing lumber
- Casing
- Jamb stock materials
- Hacksaw
- Electric drill/driver
- Paint or stain
- Paintbrush
- Pocket door hardware
- 6-in. drywall taping knife
- Drywall, reinforcing tape, and joint compound
- 1-in. drywall screws
- Wood glue
|
Note: This article was submitted by a second party and the contents are subject to our disclaimer.
|


